Thursday, April 28, 2016

Metric extensions for user defined metrics OEM 12c

We can create custom alerts in oem 12c

In this example i will show how to create an alerts if there are any user locks in the DB.

On oem 12c home page

go to

Enterprise > Monitoring > Metric extensions

Create a new metric
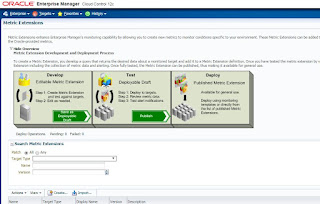


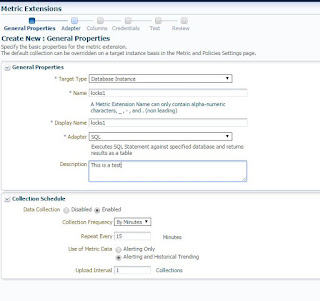
Target type: Choose what target this alert is for

In my case DB instance

Give a name

Adapter choose sql as i will be using a query for result

Leave the collection schedule as-is


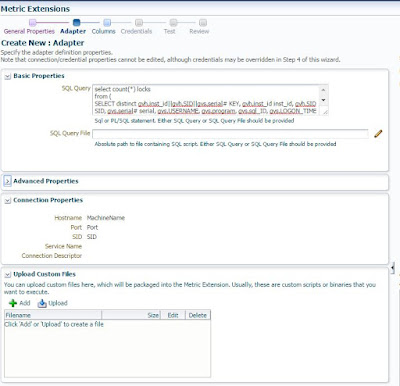
In this page just give the sql query and hit next

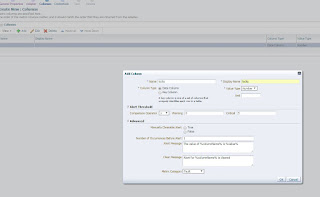
Give a column name by clicking add column and select the o/p in my case o/p is a number

select critical threshold and warning

I chose >0 which means i get alerted immediately if there is a lock

I classified it as fault

Hit next
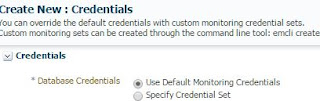
I used default monitoring credentials
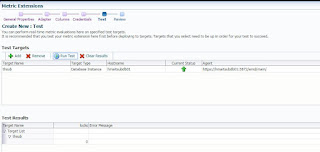
tested with a test instance. Test was successful. Hit next
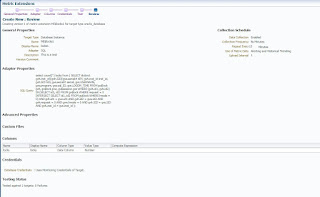


Click finish

Go to metric extensions page again. You will see the metric you just created

select that and click actions and select save as deployable draft
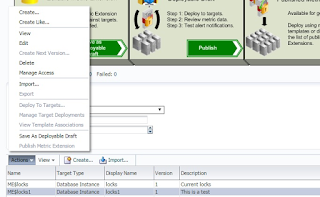

Once that is done. select the metric and click actions again and choose deploy to targets.
Add the target you want here to get alerted for and click Add
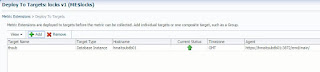
Once thats done. You are ready to go. Goto target page. Click Oracle database> Monitoring> All metrics

Here you will see the locks metric that you just created
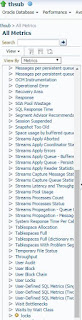

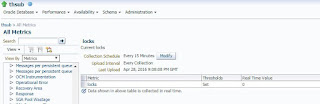
Select it and you will see the current real time data.

Once you verify it is there. You need to configure your email alerts in incident rules as below.



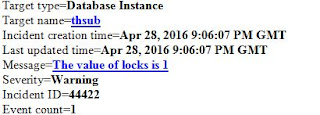
Once thats done, Create a test table and update it from two different sessions without commit. You should see your alert email as below :)
Monday, April 25, 2016

Changing AWR snapshot retention

To check what the current retention is

 select extract( day from snap_interval) *24*60+extract( hour from snap_interval) *60+extract( minute from snap_interval ) snapshot_interval,
extract( day from retention) *24*60+extract( hour from retention) *60+extract( minute from retention ) retention_interval,
topnsql
from dba_hist_wr_control;


SNAPSHOT_INTERVAL RETENTION_INTERVAL TOPNSQL  
----------------- ------------------ ----------
               60              20160 DEFAULT  


Current retention is snapshot every 60 minutes and retention days=20160 minutes

which means 14 days (24*14*60)


If we want to change retention to 10 days

which means (24*10*60) = 14400

 execute dbms_workload_repository.modify_snapshot_settings ( interval => 60, retention => 14400);


Monday, April 18, 2016

enq: TX - allocate ITL entry fix

This is the fix for enq: TX - allocate ITL entry

First find the table your are having issues with

Check AWR report to verify you have ITL waits on the table

On the AWR it should look like this

Segments by ITL Waits

  * % of Capture shows % of ITL waits for each top segment compared
  * with total ITL waits for all segments captured by the Snapshot

Owner Tablespace Name Object Name Subobject Name Obj. Type       ITL  Waits % of Capture
PIN   HMA_ODS_DATA      CURR_ACX_PROFILE                  TABLE           3               84.30


Now we have 2 options

Increase INITRANS parameter.

Defualt value for tables is 1
Default value for index is 2

I found an article online which suggested to increase INITRANS to 100. I am not sure what happens if i just increase it to 3 or 4 depending on waits i see on AWR report. I will reupdate this article if i try again in future.

So i decided to change INITRANS to 100

If we change INITRANS using the below statement, only the newly modified values have this in effect.

alter table <table name> INITRANS 100;

To apply it for the whole table we need to use move

alter table <table_name> move;


After this rebuild the indexes as the above operation will invalidate them

alter index <index_name> rebuild INITRANS 100;

For me doing the above fixed the issue.

*************************************************************************

However if it did not fix the issue you can try adjusting PCTFREE

If the issue is not resolved by increasing INITRANS then try increasing PCTFREE. Increasing PCTFREE holds more space back and so spreads the same number of rows over more blocks. This means that there are more ITL slots available overall

alter table <table name>  PCTFREE 40;

alter table <table_name> move;

After this rebuild the indexes as the above operation will invalidate them

alter index <index_name> rebuild PCTFREE 40;

*************************************************************************

We can change both at the same time as well

alter table <table name>  PCTFREE 40 INITRANS 100;
alter table <table name> move;
alter index <index_name> rebuild PCTFREE 40 INITRANS 100;


Wednesday, April 6, 2016

Tar, gzip and Untar in solaris

cd /opt/app/oracle/product/11.2.0
tar cEvf database.tar /opt/app/oracle/product/11.2.0/11.2.0.4

cd /opt/app/crs/11.2.0
tar cEvf grid.tar /opt/app/crs/11.2.0/11.2.0.4


To untar it

tar -xvf database.tar
tar -xvf grid.tar


To gzip the tar file
gzip database.tar
gzip grid.tar

To unzip and untar
tar xvfz database.tar.gz
tar xvfz grid.tar.gz


Also try if above doesnt work

gtar xzvf somefile.tar.gz
if that doesn't work:
gunzip -c somefile.tar.gz |tar xvf - 

Monday, March 21, 2016

Partitioning existing tables in oracle database

Partitioning tables


If we have an existing table that need to be partitioned here are steps to follow

Consider a non partitioned table testx which has around 500000 rows

We can partition table based on requirements

Say we have a column called date which is in this format 20160401000000

Format is yyyymmddhhmmss


I will create a new table testx_partition with the following syntax. While creating table that will include partition name with a maxvalue clause. Here i chose partition name as TESTX_MAX

CREATE TABLE SVADAPALLI.TESTX_PARTITION
(
  RDR_KEY                         NUMBER,
  VEHICLE_KEY                     NUMBER,
  DATE                            NUMBER,
  VEHICLE_ID                      NUMBER,
)
TABLESPACE USERS
PCTUSED    0
PCTFREE    10
INITRANS   1
MAXTRANS   255
STORAGE    (
            INITIAL          80K
            NEXT             1M
            MINEXTENTS       1
            MAXEXTENTS       UNLIMITED
            PCTINCREASE      0
            BUFFER_POOL      DEFAULT
           )
LOGGING
NOCOMPRESS
NOCACHE
NOPARALLEL
MONITORING
PARTITION BY RANGE (DATE)
(PARTITION TESTX_MAX VALUES LESS THAN (MAXVALUE));

Once the empty table is created, The next step is to move the data from original table to partition table

This is called partition exchange

ALTER TABLE testx_partition
  EXCHANGE PARTITION testx_max
  WITH TABLE testx
  WITHOUT VALIDATION;
 
 
  Once the above is done all values from original table will be moved to the new table.
 
 
  Now drop the original table and rename the new table.
 
  Drop table testx cascade;
 
  rename testx_partition to testx;
 
 
  Once this is done your new table will now have all your data in TESTX_MAX partition.
 
  Now that you have your data, you can easily split partition and create new partitions depending on your requirements. In my case i will do it monthly here.
 
  ALTER TABLE TESTX
 SPLIT PARTITION TESTX_MAX AT
 ('20160201000000')
 INTO (PARTITION TESTX_JAN
       TABLESPACE USERS
       PCTFREE    10
       INITRANS   1
       MAXTRANS   255
       STORAGE    (
                   MAXSIZE          UNLIMITED
                   BUFFER_POOL      DEFAULT
                   FLASH_CACHE      DEFAULT
                   CELL_FLASH_CACHE DEFAULT
                  ),
       PARTITION TESTX_MAX)
  UPDATE GLOBAL INDEXES;

OEM 12c java.lang.OutOfMemoryError: Java heap space

agent bin directory: /opt/app/oracle/agentHome/core/12.1.0.2.0/bin

agent logs directory: /opt/app/oracle/agentHome/agent_inst/sysman/log

cat gcagent.log

and error looks like below

2016-03-21 10:35:47,412 [5421649:68EFA393:CRSeOns] INFO - uncaughtException handler with
java.lang.OutOfMemoryError: Java heap space

2016-03-21 10:35:50,446 [1:main] ERROR - agent main throw an error
java.lang.OutOfMemoryError: Java heap space

[153032:GC.Executor.70250] ERROR - Critical error:
oracle.sysman.gcagent.task.TaskZombieException: task declared as a zombie

emd properties directory: /opt/app/oracle/agentHome/agent_inst/sysman/config


1) Stop the agent:
./emctl stop agent

2) Back up the emd.properties file[../agent_inst/sysman/config] and edit as follows:

a) Add these lines:

_zombieSuspensions=true
_canceledThreadWait=210

b) Change the indicated line as follows:

from :
agentJavaDefines=-Xmx128M -XX:MaxPermSize=96M

to:
agentJavaDefines=-Xmx512M -XX:MaxPermSize=96M


3) Start the agent:
./emctl start agent

Friday, March 18, 2016

Lock and unlock table stats

Some times table statistics might be locked.

If you try to gather stats in lock  state you will get error like this

ORA-20005: object statistics are locked (stattype = ALL)
ORA-06512: at "SYS.DBMS_STATS", line 24281
ORA-06512: at "SYS.DBMS_STATS", line 24332
ORA-06512: at line 2


So to unlock it here is the query you need to use

exec dbms_stats.unlock_table_stats('HMA_TM_PROD_GEN2_MONITOR','ZZT_SERVICE_LOG');

Now stats gathering will go fine.

To relock again

exec dbms_stats.lock_table_stats('HMA_TM_PROD_GEN2_MONITOR','ZZT_SERVICE_LOG');


Unlock all table stats in schema

select 'exec dbms_stats.unlock_table_stats (''HMA_STAGE'', '''||table_name||''');' from dba_tables where owner='HMA_STAGE';

Featured Post

Apply Patch 22191577 latest GI PSU to RAC and DB homes using Opatch auto or manual steps

Patch 22191577: GRID INFRASTRUCTURE PATCH SET UPDATE 11.2.0.4.160119 (JAN2016) Unzip the patch 22191577 Unzip latest Opatch Version in or...
